Monday, November 1, 2010

Renovation vs. New Construction Saves Project and Reduces Cost by $2M.

Renovation vs. new construction saves project and reduces cost by $2M. The construction time was reduced to meet the required move in date needed to start production.
Birds Eye View of Completed Project

Defining the Project
Larsen Dye Associates Architects (LDaa) provided programming consulting services to assist the owner in locating an appropriate site or building for their expansion. The owner used the information to make a decision to purchase the property adjacent to their existing facility. A local contractor approached the owner and proposed a Design Build scheme to demolish the existing buildings on the site and replace them with a new 50,000 square foot building for a cost of $8,000,000.00. Included in the proposal was a 40:60 savings clause for a construction period of 14 months following the completion of their design documents.
Typical Interior Before
  
The owner needed to have the facility in operation within 10 months and the construction budget needed to be lowered by 25% to make the project work.
Electrical Systems Before

Solution
The owner consulted with Larsen Dye Associates Architects and commissioned LDaa to provide the programming phase to determine how the project could be brought into budget and on time.

Following a detailed operational review, the team lead by LDaa provided a program of spaces that the owner would need to successfully operate their manufacturing facility. It was determined that the owner could meet their objectives within an area of 40,000 to 45,000 square feet of building area.
Interior Walls Before

Exterior Surfaces Before

LDaa reviewed the existing property and buildings on site with the structural, mechanical, and electrical consultants. The exterior walls were an uncoordinated mixture of concrete, block, metal siding, store front and metal siding. The exterior walls had not been maintained and they had exceeded their useful life. In addition, it was unlikely that the new openings would coordinate with the existing openings. The mechanical systems were vent and heat only with a few modular offices inside of the building shell with their stand alone residential type HVAC systems. The electrical system did not meet code and was under capacity. The plumbing was very limited and only served the modular office spaces. The structural frame, work even though it was pieced together over three phases, was structurally sound and reusable. The shell of the building enclosed approximately 65,000 square feet.
Office Bay Before

Open Bay Manufacturing Before

Within a few days, LDaa proposed a design to strip the building and retain the steel framing and the majority of the floor slabs. All of the exterior site work would be demolished and reworked as paving and utilities were installed. To accelerate the construction the design team proposed that a demolition package be issued while the construction documents and permits were being secured for construction. Larsen Dye Associates and Fratto Engineering proposed that the mechanical units be preordered while the demolition phase was underway. The design would provide the owner with 20,000 square feet for future expansion or flexibility as the final design was completed. The proposed design was estimated to be able to meet the original schedule and allow the owner to occupy the building within ten months.
Modular Office Before

Rigid Frame Bay Components

LDaa evaluated and presented 3 contractors to the owner that could provide the construction of the new facility. It was decided that the original company being the larger of the companies could provide the man power to complete the project under the new accelerated effort. The contract was converted to a Guaranteed Maximum for the construction with a time stipulation.
Entry Before Renovation
Sagem Entry After Renovation


The design team prepared the site and demolition documents and the City of Grand Prairie approved the work to begin. In the final design, 2,000 square feet of the building was removed to allow better access and transition into the entry of the building. The final envelope of the building was 63,000 square feet. The construction with finish out was $92.00 per square feet. The owner retained 18,000 square feet for expansion and aircraft hanger space.
Shell Space After Renovation

Entry Lobby After Renovation

A small portion of the slab was replaced and other slab areas were saw cut and repaired for the installation of plumbing.
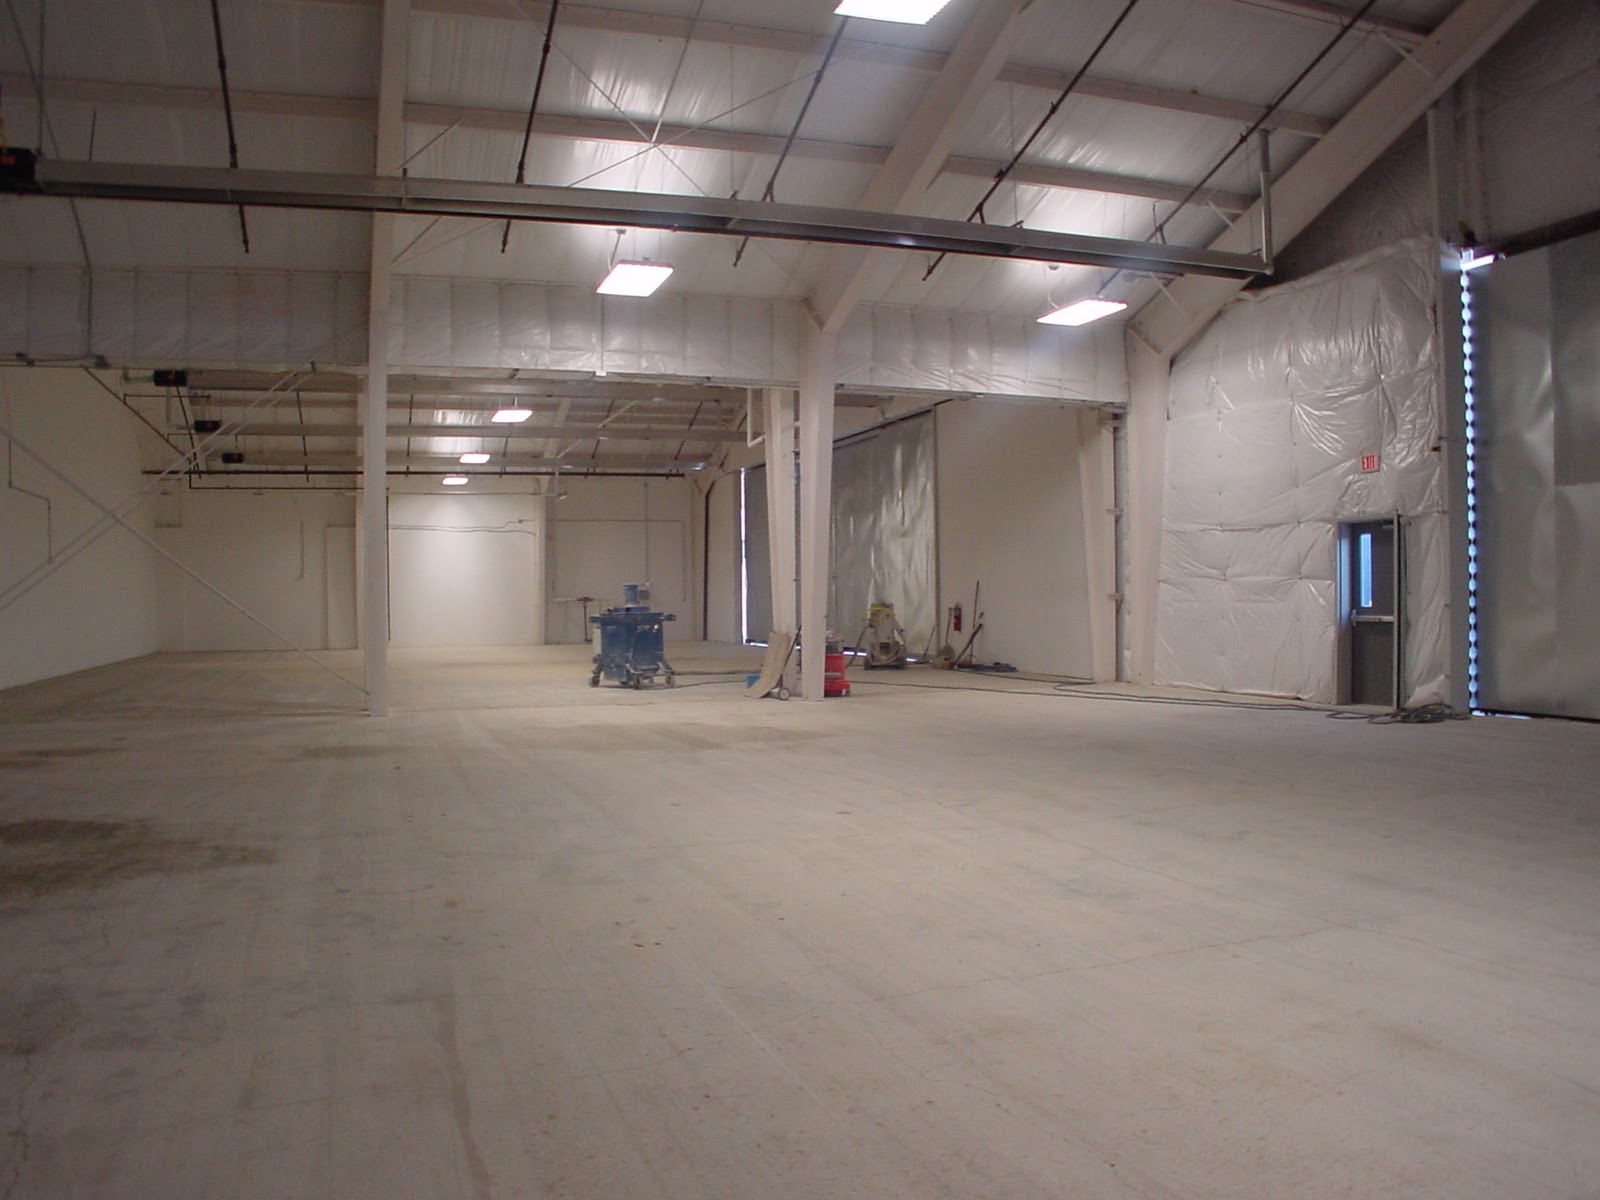
Manufacturing Work Area After Renovation

Interior Common Area after Renovation

The project and site was designed to meet the requirements of ADA and TDLR. Because of the savings, the design was more sustainable by using the embodied energy existing slab and steel framing. It also allowed the owner to add features to exceed the minimum requirements of the Energy code.
Exposed Mechanical and Floating Ceiling

Hanger Bay After Renovation

Lessons Learned
  • The construction cost to renovate was significantly less than new construction when the slab and rigid steel frame are reused.
  • Adaptive reuse of buildings with large clear span framing allows flexible space planning.
  • Rigid frame bays can typically be added to and removed to modify the perimeter of the building.
  • Reuse of damaged exterior metal wall panels was not as desirable as replacing all exterior walls with new highly insulated panels.
  • Floating ceiling panels can be used to give the feeling of an intimate space without lowering all the ceiling areas.
  • Large industrial buildings are traditionally designed to allow more movement than bearing wall construction and shorter spans. Integrate design elements that allow for the movements such as floating the ceilings away from walls, adding joints to hide wall movement, and limit walls that extend to the structural elements.
  • Typically high energy efficient windows also provide added acoustical barrier from high noise areas.
  • Standard building materials and textures used with good detailing can add just as much appeal as high end trendy finishes.

Credits
Owner: Sagem AvionicsGrand Prairie, Texas
Architect: Larsen Dye Associates Architects, Richard A. Larsen, AIA
Mechanical and Electrical – Fratto Engineering, Mark Fratto, P.E.

Wednesday, September 15, 2010

Limited budget renovation for energy efficiency and flexible space.

With a limited budget, the owner renovated two adjoining older buildings. The venue space needed to be energy efficiency and create a flexible space.


Defining the Project
Jo Ann Goin, the owner of Glory House Catering occupied a quaint building in the historic Heritage District in Downtown Irving, Texas. As the business grew she needed space to expand the rapidly grown catering business. Jo Ann’s long term business model called for her to operate a venue for the events as well as cater events.

The business needed to stay open while the renovation and expansion project was being completed. The adjacent vacant space could be used to transition the work areas.

Energy efficiency features and the replacement of outdated heating and air conditioning systems were part of her going green program.

The exterior of the building had cracked and missing brick. Multiple exterior doors created an undefined entry and an accessible entry to the building needed to be provided to meet the handicap codes.

The interior of the space to be added was cluttered with small disjointed rooms, dark corridors, a room sized hot tub encased in a mirrored room, outdated walls and floor finishes, and low ceilings.

The two buildings were constructed at different times. When exploratory demolition occurred, we discovered that the floor levels were four inches different and there were two independent walls separating the suites.

Solution
Jo Ann developed ideas for her proposed floor plan along with a phasing plan based on recommendations from Larsen Dye Associates Architects (LDaa). After the general concept was established, the contractor began selective interior demolition to allow the architect to observe conditions of construction.

The structural engineering firm of Frank Neal and Associates worked with LDaa to maximize the opening between the proposed venue spaces. Concrete foundations, steel columns and beams were added to support the roof loads of the demolished walls.
Old toilets during renovation

The back areas of the new space were selectively demolished and reconstructed to relocate the office and administrative spaces to relieve areas to be renovated in the catering area. Along with the offices, new accessible public toilets were added.
Foam roof and new AC units

As part of the going green efforts, a new foam insulated roofs were added. During the roof replacement, new energy efficient air conditioning units were installed. Jo Ann doubled her occupied area and achieved an energy savings of 50% with her efforts. To further reduce energy consumption, lower wattage lighting fixtures were incorporated along with timers and motion detectors were added to switch the fixtures.

The offset in floors could not be leveled since the ceiling heights were limited. The owner choose to provide ramps and seating areas to help transition the floor levels.


Lessons Learned


• The construction cost to renovate was significantly less than new construction when the majority of walls can be reused.
• Adding an adjacent space can allow the transition during construction to occur smoothly.
• Replacing outdated mechanical equipment can pay for the equipment in reduced energy cost.
• Spray foam roofing provides a quick energy efficient solution to older roofs while allowing the roof drainage to be corrected. Movement between older buildings may need to be corrected and maintained.
• White roofs conserve energy.


• Transitioning floor levels with sloped surfaces needs special design considerations.
• Add crown moldings when leaving existing grid ceilings to cover irregularities.
• Use finish colors and materials that can be neutral to other color schemes used by users of a venue.
• Install the most energy efficient equipment you can afford at the time of construction to extend the life cycle of the building.


Credits


Owner: Jo Ann Goin of Glory House – catering/receptions/bistro - Irving, Texas
Architect: Larsen Dye Associates Architects, Phillip D. Dye, AIA, RID
Structural: Frank W. Neal and Associates, Frank Neal, P.E.
Interiors: Larsen Dye Associates Architects, Phillip D. Dye, AIA, RID


Tuesday, February 23, 2010

Renovation Of Commercial Buildings Requires Creativity And Endurance.

The renovation of commercial buildings requires creativity and endurance by the owner and architect. The building was doomed by engineering reports.

Defining the Project
The identity of the decision makers and the documentation of the original design and construction of the building were lost years ago. Stimulus money was poured into Texas communities during the WPA (Works Progress Administration) in an attempt to boost the economy and provide work during a failed economic time. A small community building was constructed in Irving, Texas in 1936 during this era. The building continued in use for many years but slipped into use as a dilapidated storage building until 2000 when the owner hired the firm of Larsen Dye Associates Architects (LDaa) to conduct a study to evaluate the previous engineering and architectural studies that had doomed the building to destruction.

The owner was sensitive to sustainability before most people recognized that adaptive reuse of buildings will leave a smaller carbon footprint on the environment than new construction. At the turn of the millennium most people viewed renovating buildings as being attentive to historical preservation or just maintaining a piece of history. The sixty four year old building had defects and it had been neglected and abused over the life of the occupancy. Before the renovation project was undertaken, the owner contracted with LDaa to provide an investigative study to identify the construction background of the building, structural deficiencies, code issues, and a probable cost to allow the building to be occupied.

The building was a large open space with a kitchen and toilets on one end. There were three renovations and additions to the main building. The first renovation (phase 2) added capacity to the open meeting area, which was later divided to office space. The second addition (phase 3) provided toilets with the exterior constructed of wood siding and brick. An adjacent building owner constructed a parking lot that modified the grading of the building, placing the toilet addition below finish grade. In the third renovation (phase 4), a new air-conditioning system was installed requiring an upgrade to the electrical. In this renovation, the plaster covered walls were covered with inexpensive paneling, the kitchen was updated and a lay-in ceiling was installed covering the original wood ceiling. Partition walls were added to subdivide the space for storage after the building was no longer occupied.

Structural
The original modified scissor trusses were not engineered to direct the loads vertically onto the exterior bearing walls. The force exerted by the trusses caused the double wythe exterior walls to deflect outward by as much as four inches in some locations. The phase 2 addition to the open space was constructed with tilted exterior walls to match alignment with the existing leaning walls. Additional horizontal wood beams were added in an attempt to stabilize the outward movement of the walls. In the final construction of phase 4, the vaulted ceiling was filled in with suspended air conditioning ducts and an insulated lay-in ceiling. The roof was not designed to withstand the horizontal thrust of the additional weight of the duct work and new ceiling. The roof trusses moved horizontally across the top of the brick walls and the horizontal beams added in phase 2 sheared their connections. The sagging roof created more failures as water infiltrated causing wood to rot and attract termites. The phase 4 renovation allowed damage to continue unnoticed as wood rotted and metal rusted and corroded. Each phase of construction had a different foundation slab. The shallow slabs moved independently and at different rates. Each slab was at a different finish level. The structural exterior walls were constructed of three different colors and size of bricks. The walls had cracks and openings at the construction joints.

Plumbing and Mechanical
The plumbing failed as the slabs moved under the highly expansive soils. The water, sewer and gas lines were rusted, corroded and leaked. The suspended mechanical ductwork connections failed as the roof sagged. The heating and air-conditioning system had deteriorated and replacement parts were not available.

Electrical
The electrical system was out of compliance and under capacity. The electrical service power was disconnected due to multiple water leaks in the building that had rusted many of the conduits, panels and electrical fixtures. The demolition crew uncovered a few historical lighting fixtures but none that could be salvaged. The building did not contain telephone or internet connections.

Architectural
The exterior walls tilted outward and needed to be structurally secured. All of the doors and windows were damaged beyond reuse. The building was not accessible even though a ramp had been added to the front entrance and some misplaced grab bars added in the toilets. The interior plaster covering the brick walls contained asbestos. The interior partitions were damaged by termites or rotted due to water infiltration. The ceilings had collapsed dumping the insulation and ceiling tiles on the floor. The vinyl asbestos tile (VAT) flooring had peeled up due to moisture under the slab. The kitchen cabinets and equipment was damaged beyond repair. The interior and exterior walls of the toilet addition had crumbled after being exposed to water for extended periods of time.

Decision to Renovate
Instead of demolishing the building, the owner decided to remove the unsafe and highly deteriorated portions of the building and replace them in a manner to complement the original architectural character of the building. The building had no historical landmark designation because it had been renovated without consideration of preserving or being consistent with the original WPA design. This allowed the owner to attain grant funding for renovating a public use building without having to follow guidelines for preservation.

Programming and Design
The program from the owner provided the limitations that would define the final design. The character of the building should replicate as close as possible the design features of the original building as shown in a photo archived in a newspaper article. The footprint of the building should not exceed the current perimeter except as required to meet accessibility requirements. The owner would abate the hazardous materials after the building interiors were removed and the structure stabilized.

Demolition
The rear or west exterior wall and the phase 3 addition of the toilets were deteriorated to the point that they could not be reused or stabilized structurally. The roof trusses and interior partitions were removed as the abatement proceeded. The interior and exterior doors and windows were removed along with all millwork and paneling. The building was then encapsulated and the (VAT) flooring and plaster coverings were abated.


Drainage
After evaluating the site, LDaa's design team provided recommendations for stabilizing the floor slabs and reducing movement of the walls. The adjacent parking lot construction channeled water into the site causing the area drain to exceed the capacity to handle the runoff. The owner had covered the area drain causing water to pond around the building. The team designed a concrete border around three sides of the building to direct runoff to the larger area drain and to the street storm sewer. A large damaged tree was removed to reduce future damage to the slab and provide clearance for drainage.

Structural Slabs
The renovation design called for reusing the existing slabs after removing a four foot wide section and doweling the slab sections together. The final slab was to be floated with an epoxy structural topping to level the finish floor. After removing the four foot wide section, the exposed slab illustrated that the slabs had been built with out steel. To complicate the reuse of the slabs there was a void under the slabs where the soil had expanded and contracted seasonally forcing the supporting soils clear of the slab. The owner approved redesign and removal of the remaining slabs leaving the perimeter beams in place. The new monolithic slab was designed to connect the perimeter beams to provide additional support of the walls. To permanently stabilize the exterior walls, an interior box diaphragm was constructed of structural steel studs. The box provided positive connections to the brick walls through auger type bolts to resist withdrawal. The new structural studs provided the top bearing plate for the new roof trusses releasing pressure on the exterior walls. Control joints were incorporated in the interior gypsum board to allow movement to minimize cracking of the walls and ceilings.

Architectural Exterior Details
LDaa selected a roof shingle that matched the diamond pattern of the roof shingles in the owner's archive photograph. The shingles selected were a coastal high wind resistive profile that will extend the life of the roof. The original windows were steel casement but had been replaced by single pane extruded aluminum frame windows. To match the original window profile LDaa selected energy efficient vinyl covered wood windows. An insulated steel door was designed to match the frame of the original door and to provide security and durability. Any exterior brick that was removed was salvaged, cleaned and reused. Additional brick to match the shape and texture were purchased to complete the construction. This resulted in four colors of brick and three colors of mortar. The architect selected a special coating material for the brick that could be spray applied. A single color for the brick was selected from samples applied on site. All of the exterior walls were coated with the water resistant stain including the mortar joints. A mortar color was selected from the stain samples and the joints were hand painted. A ramp was constructed from the north parking lot to the entrance and was concealed by a lighted screening wall that also served to mount the building signage.

Interior Finishes
The color palette was set by the existing brick chimney that would be exposed in the open space of the entry. A durable modular carpet was used as floor covering. A pattern of coordinated stripes was added to cover any movement anticipated in the slab. A floor base color was selected to match the brick and carpet. The walls and ceilings were painted a neutral color. The tile patterns in the toilets were designed to mimic patterns indicative of the era of the original building. A red mahogany finish was selected for the solid wood doors to match the floor and base.

Accessibility
The building had open space and a clear span roof. The infill of office and workrooms was accommodated into the floor plan to provide accessibility. One of the first design decisions was to demolish the toilet addition that consisted of a space too small to accommodate new toilets. Designing accessible toilets was simpler after we set the floor plan for the new toilet area. A conventional slab was used along with exterior walls of metal studs and brick veneer. The kitchen area was large enough to construct an accessible layout. The main entrance was too narrow to meet the clearances for a person in a wheelchair to open the door. Automatic electronic door openers were added allow a wheelchair to enter without having to touch the door. Security features were added to the openers to lock down the facility and prevent entry by an unauthorized person. On the site, bridges were added over the water flumes. A ramp was added from the parking area to the main entrance and exit.

Lessons Learned


  • The construction cost to renovate was slightly less than new construction.

  • The owner was able to have a larger building floor plan by renovation than by new construction. New construction would have required compliance with current parking, landscaping, and setback requirements.

  • The special coatings on the building provided a unified color and the material sealed the old brick from moisture that could create additional deterioration. If the owner had chosen, they could have sealed/colored each brick to resemble a blended pattern.

  • Do not plant trees closer than ten feet of a building.

  • Maintain positive drainage around the slab of a building.

  • Avoiding interior load bearing partitions allows a flexible floor plan for adaptive reuse.

  • Use color to highlight the existing patterns of building materials.

  • Allow building materials to extend inside and outside to tie the building together.

  • Install the most energy efficient equipment you can afford at the time of construction to extend the life cycle of the building.

Credits
Project Superintendent: Eddie Black

Thursday, January 14, 2010

Industrial doesn’t mean ugly

Industrial doesn’t mean ugly


Latest design trends include functionality, curb appeal, flexibility


Dallas Business Journal - by Rachel Crosby Correspondent
Friday, September 4, 2009
 Two factors are the prime drivers of how current industrial spaces are designed: functionality and efficiency.  Recently, however, designing warehouses and distribution centers has become a bit more demanding as owners are increasingly seeking to include such attributes as higher clearance heights, sustainability features, flexible space and curb appeal.


Dallas-based Jeff Turner, executive vice president of Duke Realty’s southern region, sums it up this way: “There’s a balance you have to achieve between function, design and cost.”


Functionality


“Form follows function,” said Phillip Dye, owner of Irving-based Larsen Dye Associates Architects.


Jeff Thornton, senior vice president of Duke Realty in Dallas, said today’s warehouses usually have clearance heights of at least 32 feet, curb appeal, truck courts of at least 180 feet, large bay spacing — the distance between support columns — and use Leadership in Energy and Environmental Design-certified building materials. Turner said warehouses should also have plenty of dock doors per the amount of square footage, ample parking for employees and plenty of storage space outside.


According to Doug Johnson, senior vice president and regional development officer of Atlanta-based IDI, one of the biggest trends is adding sustainability features into design. Sustainability features that improve functionality and the life of the facility include energyefficient lighting and fixtures, early suppression fast response (ESFR) sprinkler systems and larger truck aprons. Other sustainability features are less noticeable, but no less important. Sustainability guidelines are specified by the U.S. Green Building Council, which certifies LEED properties.


Flexibility in design


Flexibility is another trend the industry is seeing more in industrial buildings. “Owners are looking for buildings that will not become functionally obsolete,” said Dye. “Buildings have to be more flexible so they can be adapted to other uses as the market changes.” This trend goes hand-in-hand with higher clear heights, which not only allows more usable space and room for different types of equipment, but it also opens the door to second-floor access and expansion to a second level.


“The interior finishes and exposed surface materials are getting more attention,” said Dye. “The owners are reluctant to skimp on the exposed surfaces that will deteriorate with minimal use over a short time period.”


He also said the desire for flexibility means designers are now incorporating an external appearance that is similar to other buildings in the area.


Curb appeal


“You can get by with a warehouse being blue-collar, so-to-speak, as long as it’s functional, but if you can make it look nice and have a nice setting, then you’ve crossed two boxes off your list,” Turner said.


The need for curb appeal depends on the location of the warehouse. Todd Hanson, vice president of Fort Worth-based Schwartz-Hanson Architects, said the warehouse appearance does not matter too much if it is buried in an industrial complex, but it does matter if the warehouse is located on a major thoroughfare. Warehouses that are designed for curb appeal look like one-story office buildings.


“More exterior glass in the office area and smooth, finished, painted walls, reveals to break up the long expanses of wall. Quality, treed landscaping can provide more of an office park appeal rather than the expansive sea of concrete that many developers have designed to in the past,” Johnson said.


Specific design features depend on the company and the designer, but more companies are realizing that an attractive building is not about aesthetics; it’s also tied to corporate branding.


“The industrial market is finding that the visual appeal of their facilities must be consistent with all aspects that represent their business,” said Dye. “The built environment is as much a part of the branding of their product as the logo and Web site.”


Cost controls


One trend in industrial building practices involves downsizing in one of two ways: by either building larger buildings in fewer places or smaller buildings in more locations.


Companies are also making sure they choose a designer who won’t overbuy and who looks for the lowest-priced materials without sacrificing quality or good design, Dye said. He also said companies increasingly are hiring designers and contractors separately because of the cost benefits that come with not tying up one team with a full design-and-build project.


According to Johnson, some companies are also spending a little more to obtain one of four LEED level designations: certified, silver, gold or platinum. In the end, the savings come from water and electrical being used more efficiently. Products that provide the best cost benefit are drip irrigation systems, T-5 florescent warehouse lighting and extra roof insulation, particularly in colder, northern states.


Some design features are not only economical, but also environmentally friendly. They include concrete truck aprons, white heat reflective roofs made of thermoplastic polyolefin, skylights, clerestory, or walls of windows at the top of a building, and construction materials made of recycled or sustainable materials.

Rachel Crosby is a Grandbury-based writer.
 
http://dallas.bizjournals.com/dallas/stories/2009/09/07/focus2.html?t=printable 9/4/2009